Video Editing | Sound Tricks | AMV Creation
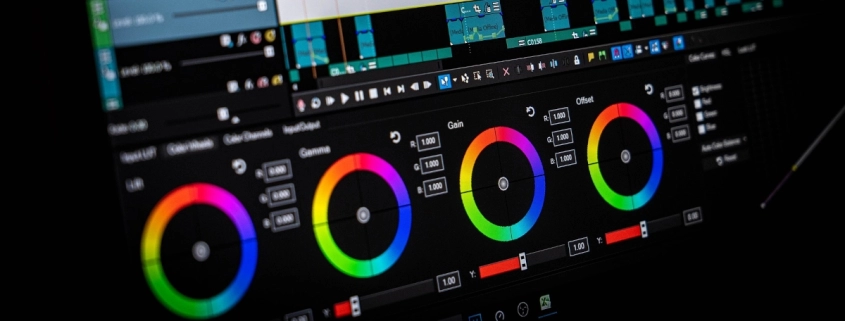
Table of Contents
🎬 How I Got into AMV Editing & Tips to Improve Audio Immersion
I first got into video editing at a young age thanks to my love for fan-made AMVs (Anime Music Videos). I was drawn to the way creators took clips from shows like Dragon Ball, Naruto, Prince of Tennis, and Chrome Shelled Regios, then set them to powerful music to create emotional, action-packed experiences.
One of the biggest challenges in AMV editing is dealing with the original audio—vocal dialogue, sound effects (SFX), and background music—which can clash with the custom track you’re adding. Most editors simply mute the video audio, but doing that removes key elements that add depth and immersion.
In this guide, I’ll show you some simple tricks to preserve or recreate the audio elements you need, so your AMVs feel more dynamic and emotionally engaging without losing impact.
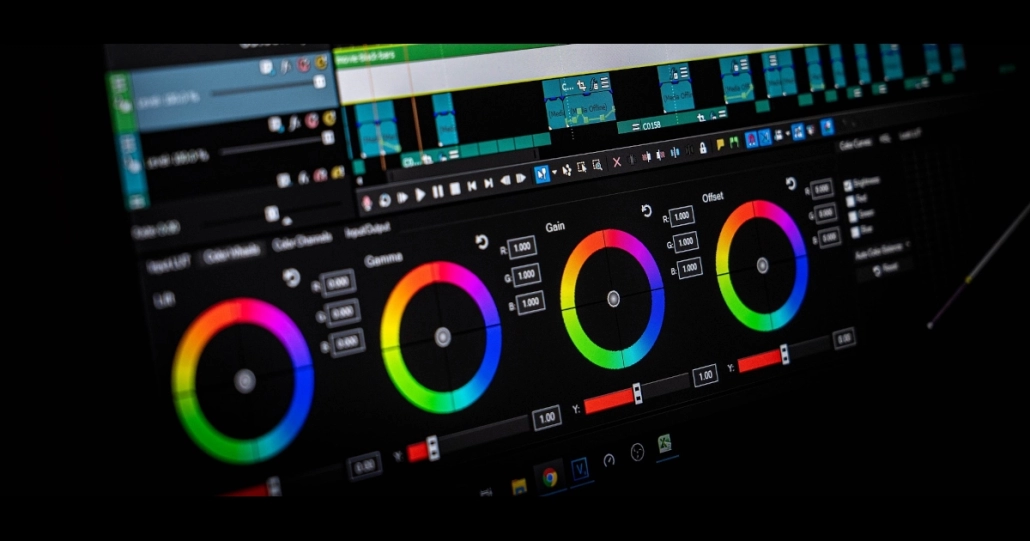
🛠️ Choosing the Right Video Editing Software
When it comes to editing AMVs or any kind of creative video, the right software makes all the difference. I currently use Vegas Pro 17—a powerful tool that I invested in despite the steep price. Before that, I also worked with Camtasia, another solid paid option.
If you’re looking for free alternatives, one classic option is Windows Movie Maker from the Windows Live Essentials 2012 suite. Though it was discontinued in 2017, the installer (look for wlsetup-all-2012-16.4.3528.331) is still available online and works great for basic editing. I even run it on a Windows 10 virtual machine for older projects.
Another great choice is HitFilm Express, which offers a free tier with enough features for most entry-level editing tasks.
Whichever software you choose, make sure it supports multiple video and audio tracks, as well as splitting and moving clips. It’s also smart to go with a program that has a strong user base—this way, you’ll find plenty of YouTube tutorials if you ever get stuck.
📀 Getting High-Quality Source Files for AMVs
To create a great AMV, you need great source material. That means using high-quality rips of your shows so both the video and audio are as clear as possible. This is essential for editing and will make a noticeable difference in the final product.
If you’re working with DVDs, there are several tools available that can convert them into editable video files. Some programs act like screen recorders, playing the disc and capturing it in real time—but I recommend using tools that do direct conversion for better quality and efficiency.
Here’s what ChatGPT has to say about choosing the best tools and formats for ripping your content…
The difference between video programs that play and record the output of a DVD versus those that directly access the files to convert them into other formats lies in how they interact with the DVD data and process it:
1. Programs that Play and Record the Output (Screen Recording or Capture)
- How They Work:
- These programs essentially play the DVD video in real time and then record what is being shown on the screen or what is playing through your system’s audio.
- They work like screen capture software (e.g., OBS Studio, Camtasia) or video recording tools.
- The process involves capturing video playback in the form of a new video file, which mimics the original DVD content.
- Advantages:
- It can bypass restrictions like copy protection (e.g., DRM) because it just records whatever is playing visually and audibly.
- Useful when dealing with content that’s difficult to extract or convert directly.
- Disadvantages:
- Quality can degrade because you are re-recording the video, often with loss of detail depending on screen resolution and encoding settings.
- The process is time-consuming, as it happens in real time. For example, a 2-hour DVD will take 2 hours to record.
- May not preserve subtitles, chapters, or menus unless specifically recorded.
2. Programs that Access Direct DVD Files and Convert Them (Ripping/Transcoding)
- How They Work:
- These programs read the DVD structure directly (accessing the original files like VOB, IFO, and BUP) and convert the data into other formats (MP4, MKV, AVI, etc.).
- Common DVD-ripping tools include Handbrake, MakeMKV, and VLC (for basic ripping). These programs directly extract and re-encode the video, audio, and subtitles.
- Advantages:
- Faster and more efficient than recording, as it directly processes the file without needing to play and record the video in real-time.
- Higher quality since you’re working with the raw DVD data. There’s less loss of quality during conversion, especially if using high-quality transcoding settings.
- Can maintain subtitles, chapters, multiple audio tracks, and menu structures if needed.
- It often allows for more advanced settings, like deinterlacing or adjusting bitrate, to improve quality.
- Disadvantages:
- Some DVDs have copy protection mechanisms (like CSS encryption, region codes) that certain programs can’t bypass unless using additional tools.
- More complex to configure compared to recording, as users may need to deal with settings like resolution, bitrate, or codec choices.
🎧 Audio Editing & AI Tools for Cleaner Tracks
Once you have your source files—often in MKV format if downloaded—I recommend using HandBrake to convert them to the more widely supported MP4 format. HandBrake lets you tweak settings to balance file size and quality perfectly.
To extract audio from MKV files and more, Audacity combined with FFMPEG is a powerful free solution. Traditional methods to isolate vocals, sound effects (SFX), or remove background music involve converting stereo audio to mono, filtering specific sounds, inverting those sounds, then reverting back to stereo. Audacity offers tools to assist with this process, using frequency-based templates.
Thanks to AI advances, much of this work is now cleaner and easier. Below is a list of popular paid and free AI-powered vocal and audio isolation tools:
Among these, I found AudioStrip worked best. Keep in mind that no tool is perfect—sometimes instrumental parts might bleed through, or vocals and effects may sound muffled or partially missing in places.
🎛️ SpectraLayers & Using Stock Sounds for Precision Audio Editing
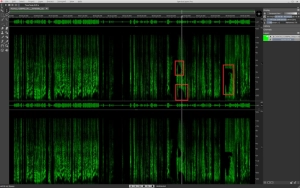
SpectraLayers takes audio editing to the next level—allowing you to visualize sound on a vertical frequency spectrum, layer by layer. This lets you identify and isolate unwanted frequencies or artifacts that AI tools might miss, then precisely remove them.
It’s an incredible program that’s surprisingly easy to use and has become a powerful secret weapon in my editing toolkit. In the image below, the red boxes highlight sound artifacts I carefully removed to improve the overall audio quality.
🔊 Replacing Missing Sounds with Stock Effects
After isolating vocals or music, you might notice some sound effects (SFX) or background elements were removed or muffled during the process. To maintain a rich, immersive audio experience, it’s important to replace those missing sounds with high-quality stock effects.
There are many online libraries where you can find free or affordable sound effects, including footsteps, ambient noises, impacts, and more. Adding these carefully chosen sounds back into your video helps restore depth and keeps viewers engaged.
Some popular sources for stock sounds include:
- Freesound.org (free and community-driven)
- ZapSplat (free and paid options)
- Soundsnap (subscription-based)
- BBC Sound Effects Archive (public domain)
Layering these sounds where needed can make your AMV or video project feel polished and professional, bridging any gaps left by the audio isolation tools.
📝 Summarized Steps for Your Workflow
I asked ChatGPT to help organize the process I followed into clear, easy-to-understand steps. This documentation is perfect for anyone interested in replicating the workflow or learning the key points quickly.
How to Create a High-Quality Music Video: A Step-by-Step Guide
This guide will take you through the process of enhancing the quality of video and audio for a music video project, specifically when working with DVD rips and other sources. Here’s a refined version of your process:
Step 1: Source Quality and Video Preparation
- Obtain High-Quality Video Source: Use DVD rips to ensure a clean video quality. Even though the source may be 480p, it should be free of compression artifacts.
Step 2: Convert Video to MP4
- Convert Video Format with Handbrake:
- Open Handbrake, a video transcoder tool.
- Load the DVD rip (usually in MKV format).
- Choose MP4 as the output format.
- Enable subtitles if desired by selecting the appropriate subtitle track.
- Start the conversion to MP4. Handbrake will process the file, maintaining video quality while making it more compatible for editing.
Step 3: Audio Extraction and Editing
- Extract Audio with Audacity:
- Open the converted MP4 file in Audacity.
- Select the sections of the audio you need for your project (e.g., dialogue, sound effects, etc.).
- Export the extracted sections as WAV or MP3 for further processing.
Step 4: Isolate Vocals and SFX
- Use AI Tools to Isolate Audio Layers:
- Utilize an AI audio isolation tool to separate vocals and sound effects (SFX) from the background music.
- Tools like VocalRemover, LALAL.AI, or similar can be used to achieve a 95% success rate in removing background music while keeping the desired audio components intact.
Step 5: Final Audio Clean-Up
- Fine-Tune with Spectra Layers:
- Import the partially cleaned audio file into Spectra Layers.
- Manually isolate and delete any remaining traces of background music from the individual sound layers.
- This allows for precision editing to ensure that only the desired vocal and SFX elements remain.
Step 6: Replace or Enhance Sound Effects
- Replace Missing or Muffled SFX:
- During the isolation process, some sound effects might get removed or sound muffled.
- Source equivalent or similar stock sound effects from libraries like Freesound or Envato Elements.
- Insert the stock sounds into your project to maintain immersion and audio quality.
Step 7: Video Editing and Final Output
- Assemble the Video in Vegas Pro:
- Open Vegas Pro and import your MP4 video and cleaned-up audio files.
- Sync the audio with the video, ensuring proper alignment with the visuals.
- Apply necessary effects, transitions, or corrections as needed.
- Upscale the Video to 4K, 60 FPS:
- Use Vegas Pro’s upscaling tools to convert your 480p video to 4K resolution.
- Set the frame rate to 60 FPS for a smoother visual experience.
- Export the final video in your desired format, ensuring high-quality settings for the best result.
By following these steps, you can create a polished, high-quality music video, transforming standard DVD rips into a refined 4K video with enhanced sound. This workflow blends powerful tools like Handbrake, Audacity, AI isolation, Spectra Layers, and Vegas Pro to achieve professional-grade results.
✅ Conclusion
By following this workflow, you can transform basic DVD rips into polished, high-quality music videos—even up to 4K resolution with enhanced audio. Combining powerful tools like HandBrake, Audacity, AI-based audio isolation, SpectraLayers, and Vegas Pro lets you achieve professional-level results. This project was a lot of fun to work on, and I’m excited to share these techniques with you!
🌿 Final Thoughts
Creating AMVs is a rewarding blend of creativity and technical skill. With the right tools and techniques, anyone can elevate their videos to a professional level. Keep experimenting, learning, and most importantly—enjoy the process!
My name is Dex, author at WinReflection.
I am a Christian, conservative, truth-seeker, and problem-solver who is not afraid to be vocal about important or controversial issues—silence leads to death. There’s more to life than the worldly status quo, and that’s why many are sad and depressed—they’re suffocating. Truth and purpose can bring fresh air into one’s life, and that’s my mission. My sidebar content should not trigger you, the proof is all there.
📖 John 3:16: For God so loved the world that he gave his one and only Son, that whoever believes in him shall not perish but have eternal life.
Leave a Reply
Want to join the discussion?Feel free to contribute!